How to set up matter Workflows
A Workflow is the list of stages a matter moves through, from the invitation to the matter to closing the matter. You can create several workflows and attach each one to the questionnaires that should use it. Each workflow gets its own tab on the Matter Progress screen.
Manage your Workflows
- Go to Customization
- Select Manage Workflows under your list of questionnaires
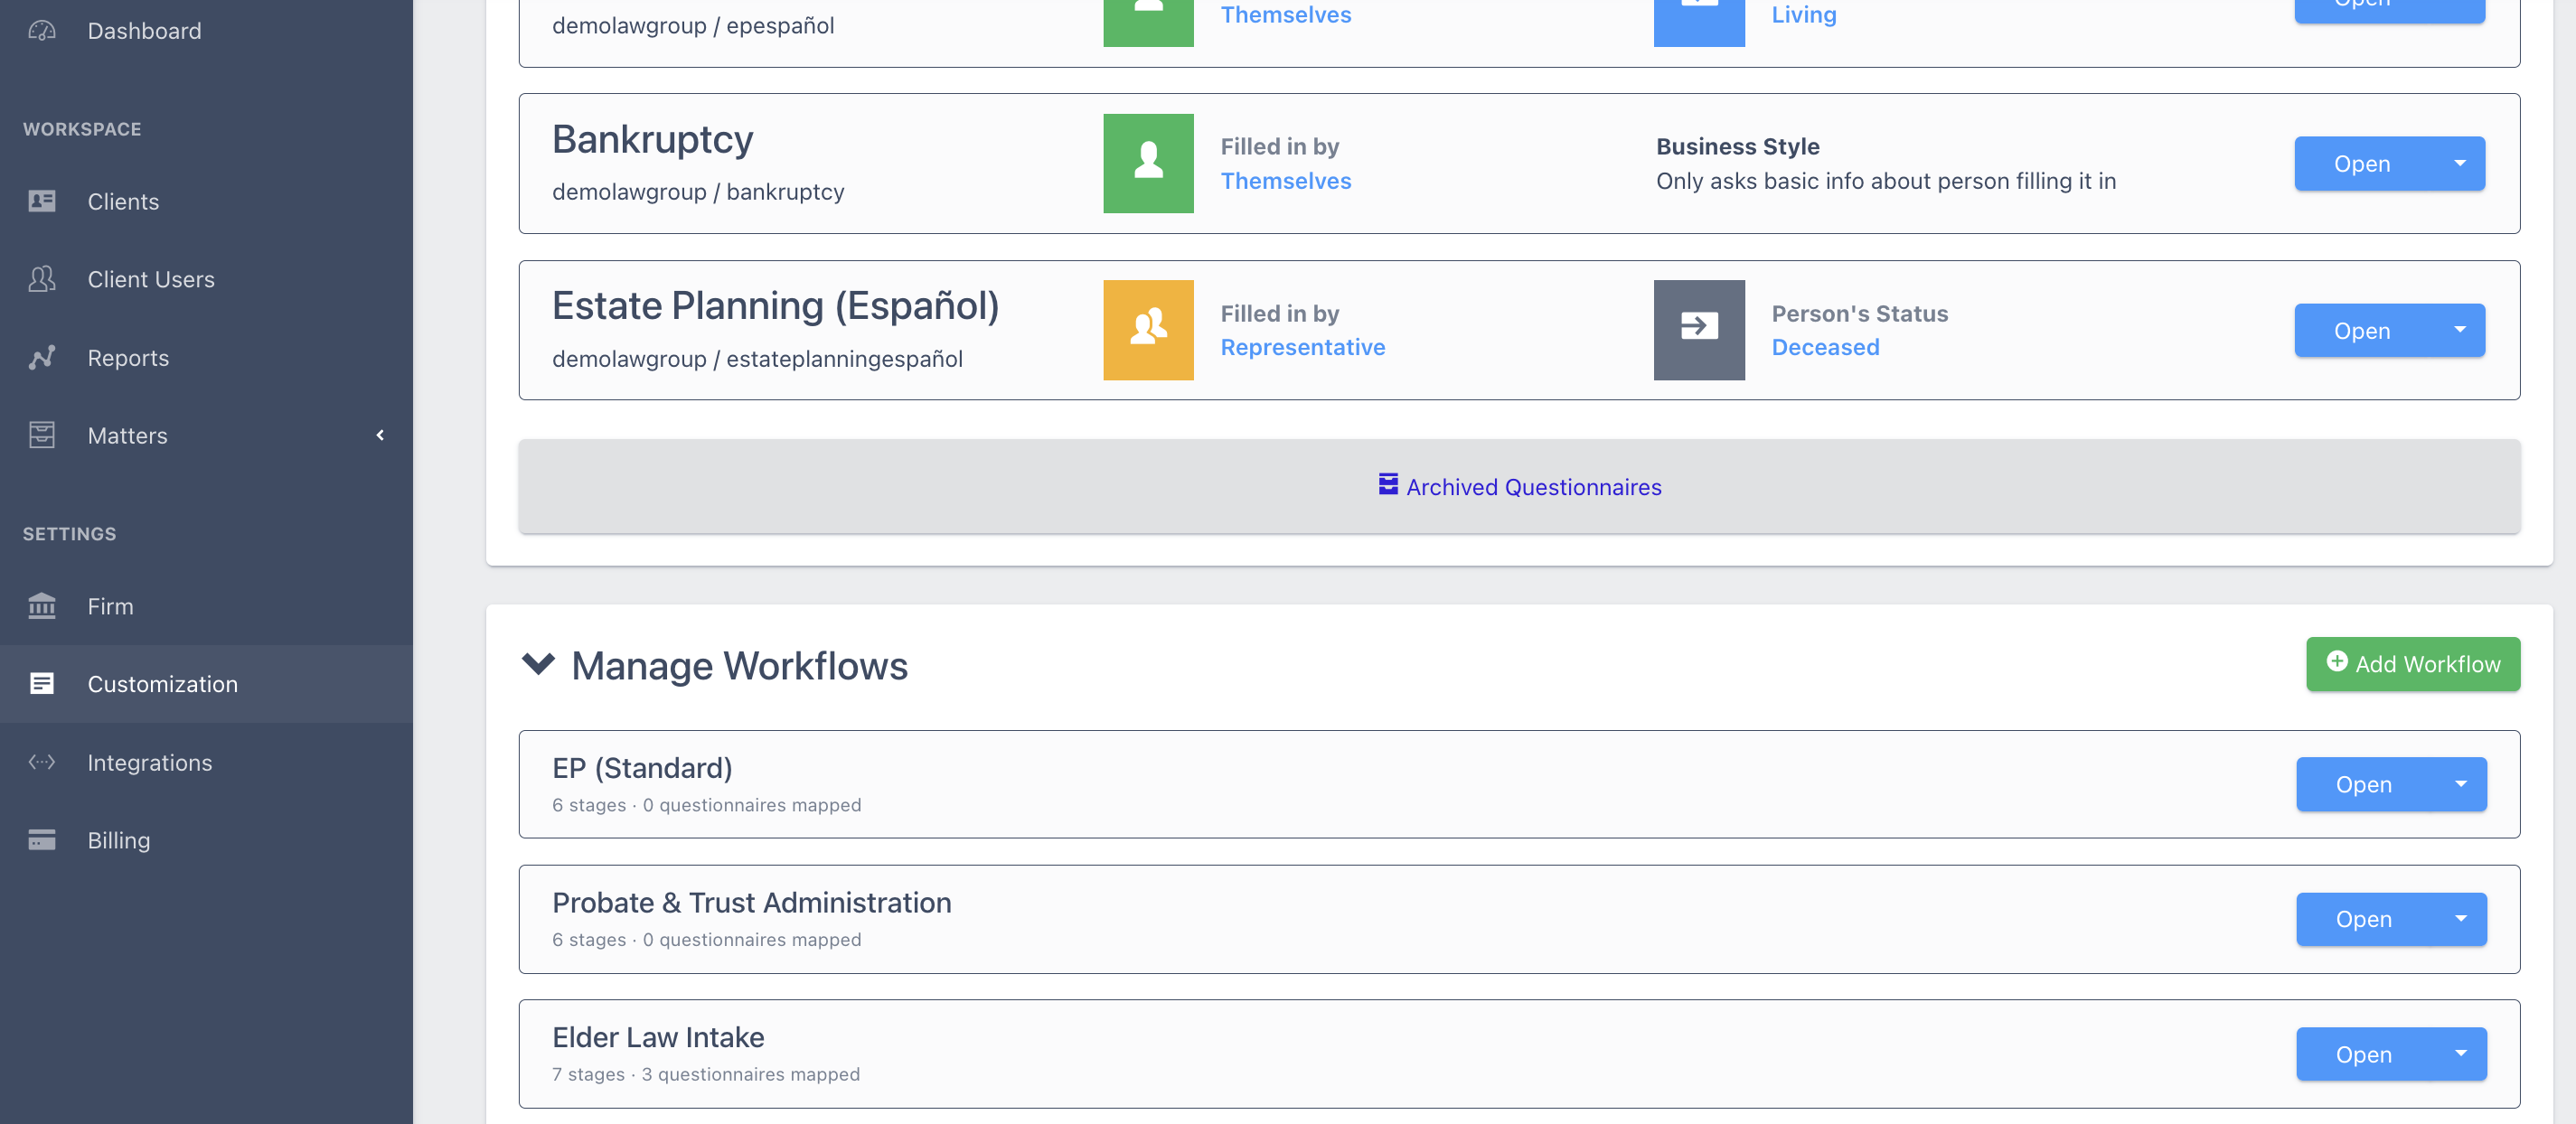
Each workflow is a row showing its name and a summary such as "7 stages · 3 questionnaires mapped", with Open and Rename buttons. Use the Manage Workflows link at the top of any workflow to come back to the list.
Create a workflow
- Select Add Workflow
- Type a name in the New workflow name field
-
Select Create (or Cancel)

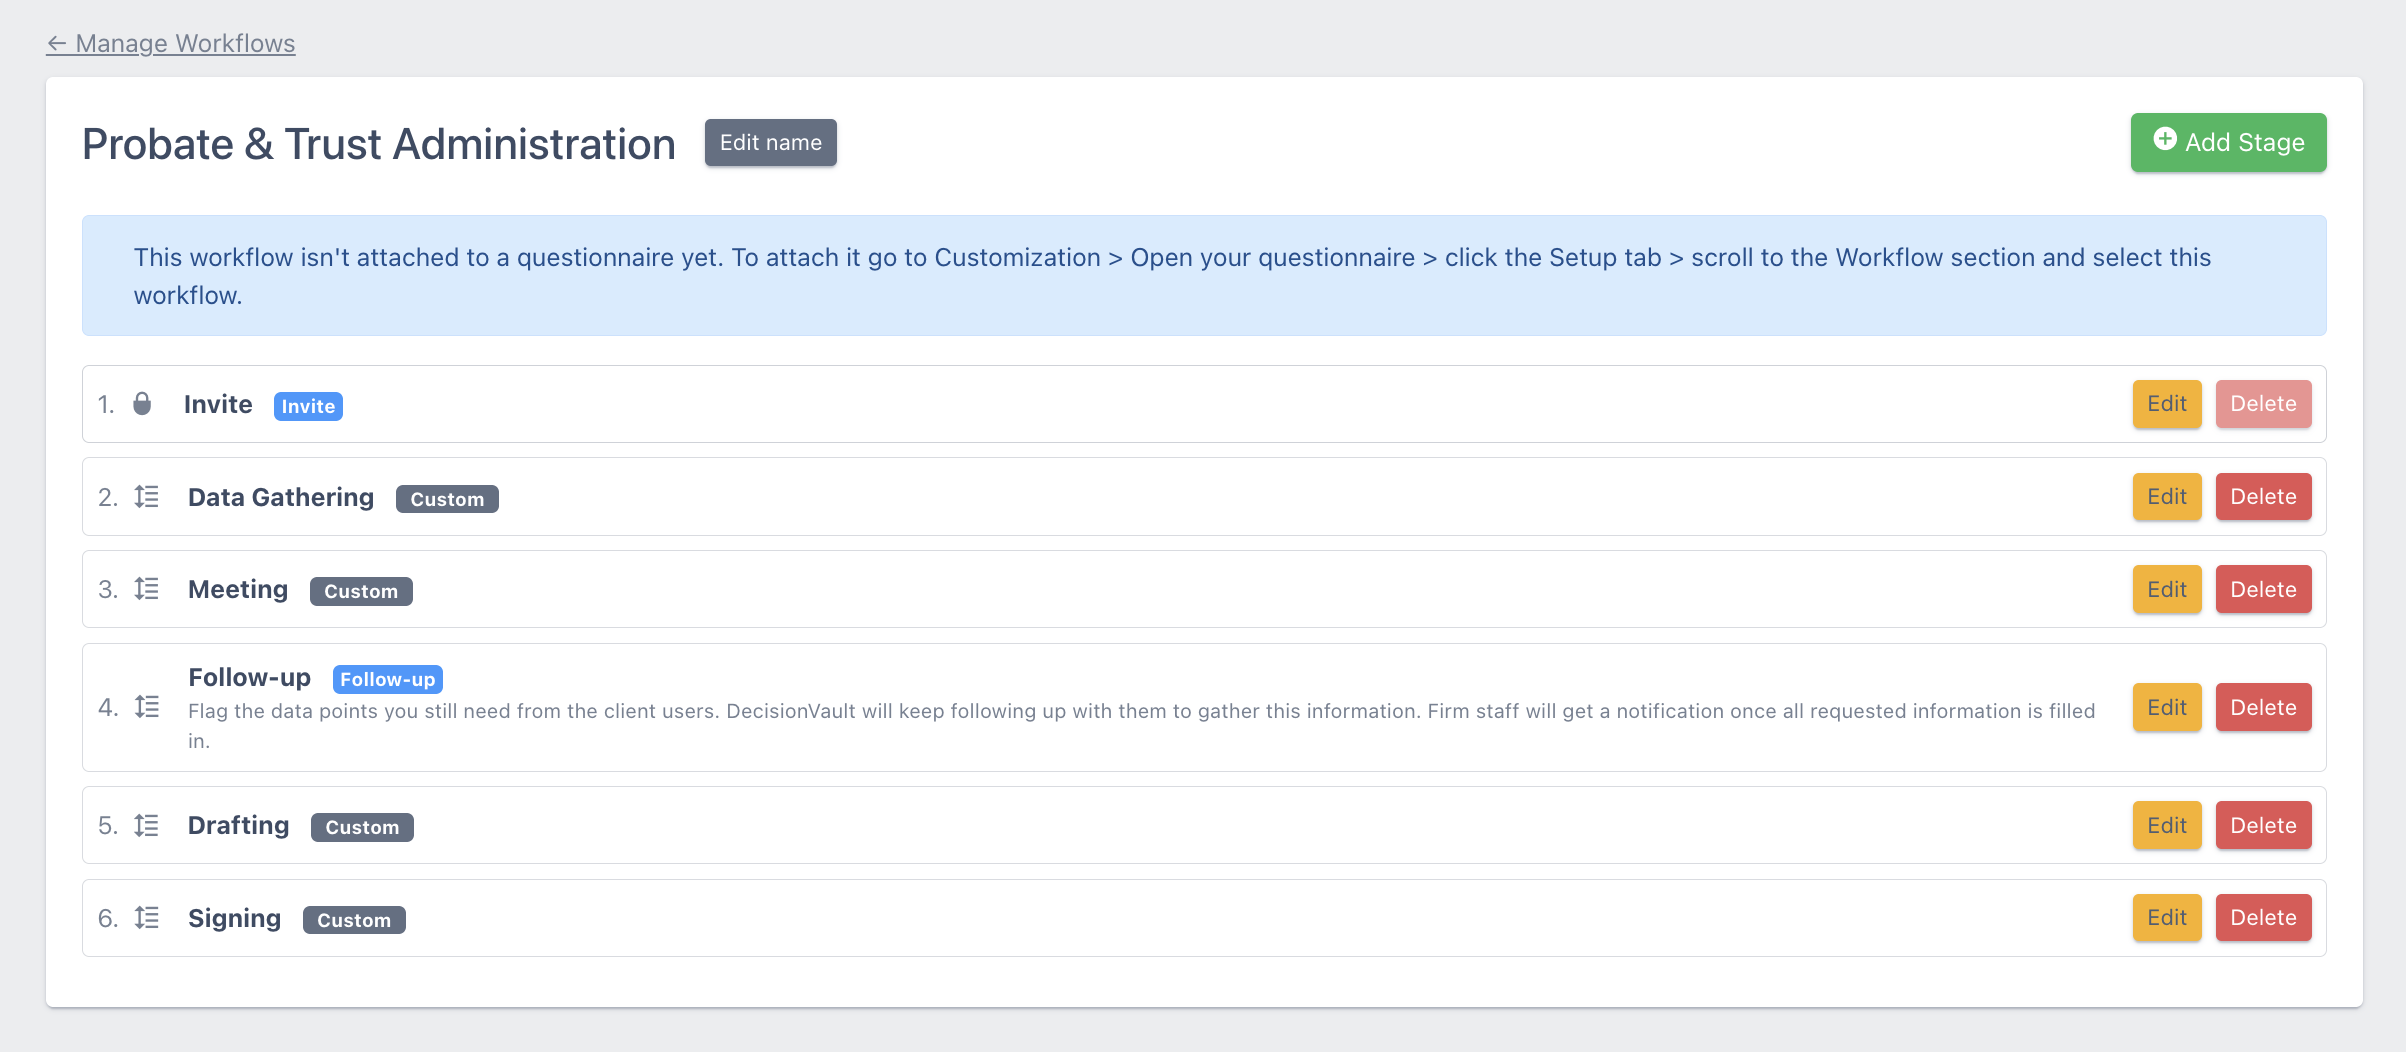
A new "Default Workflow" has six stages:
- Invite
- Data Gathering
- Meeting
- Follow-up
- Drafting
-
Signing
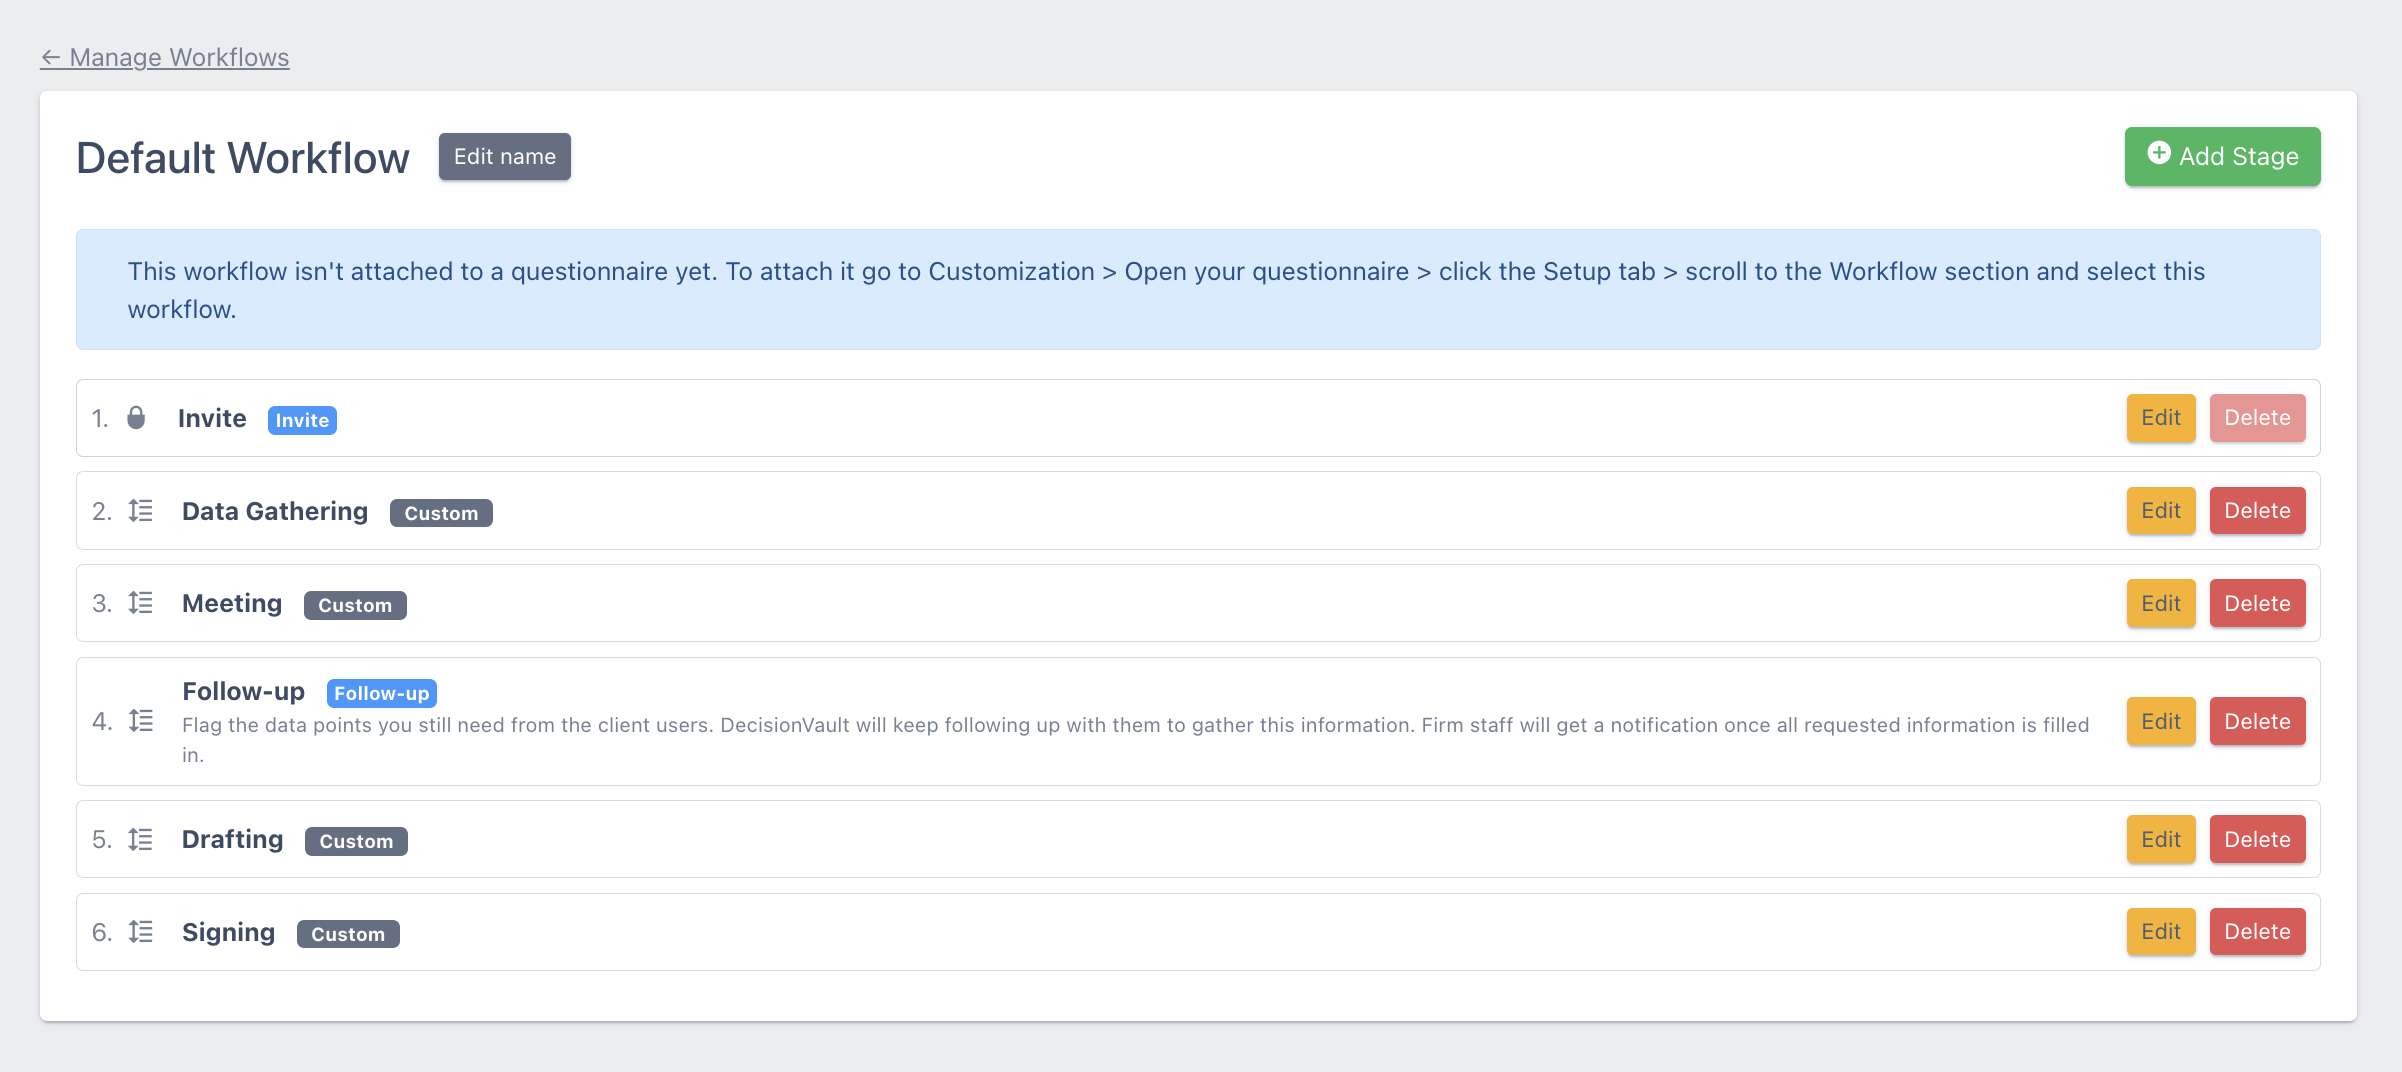
Every matter starts in Invite as soon as it is created, whether your firm creates it or a client starts a questionnaire from your standard link.
Configure the stages
Select Open on a workflow to see its stages, numbered from the top.
-
Add a stage: select Add Stage (green button, top right). The new stage is added at the bottom. Drag it where you want it. Stages you add show a Custom tag.
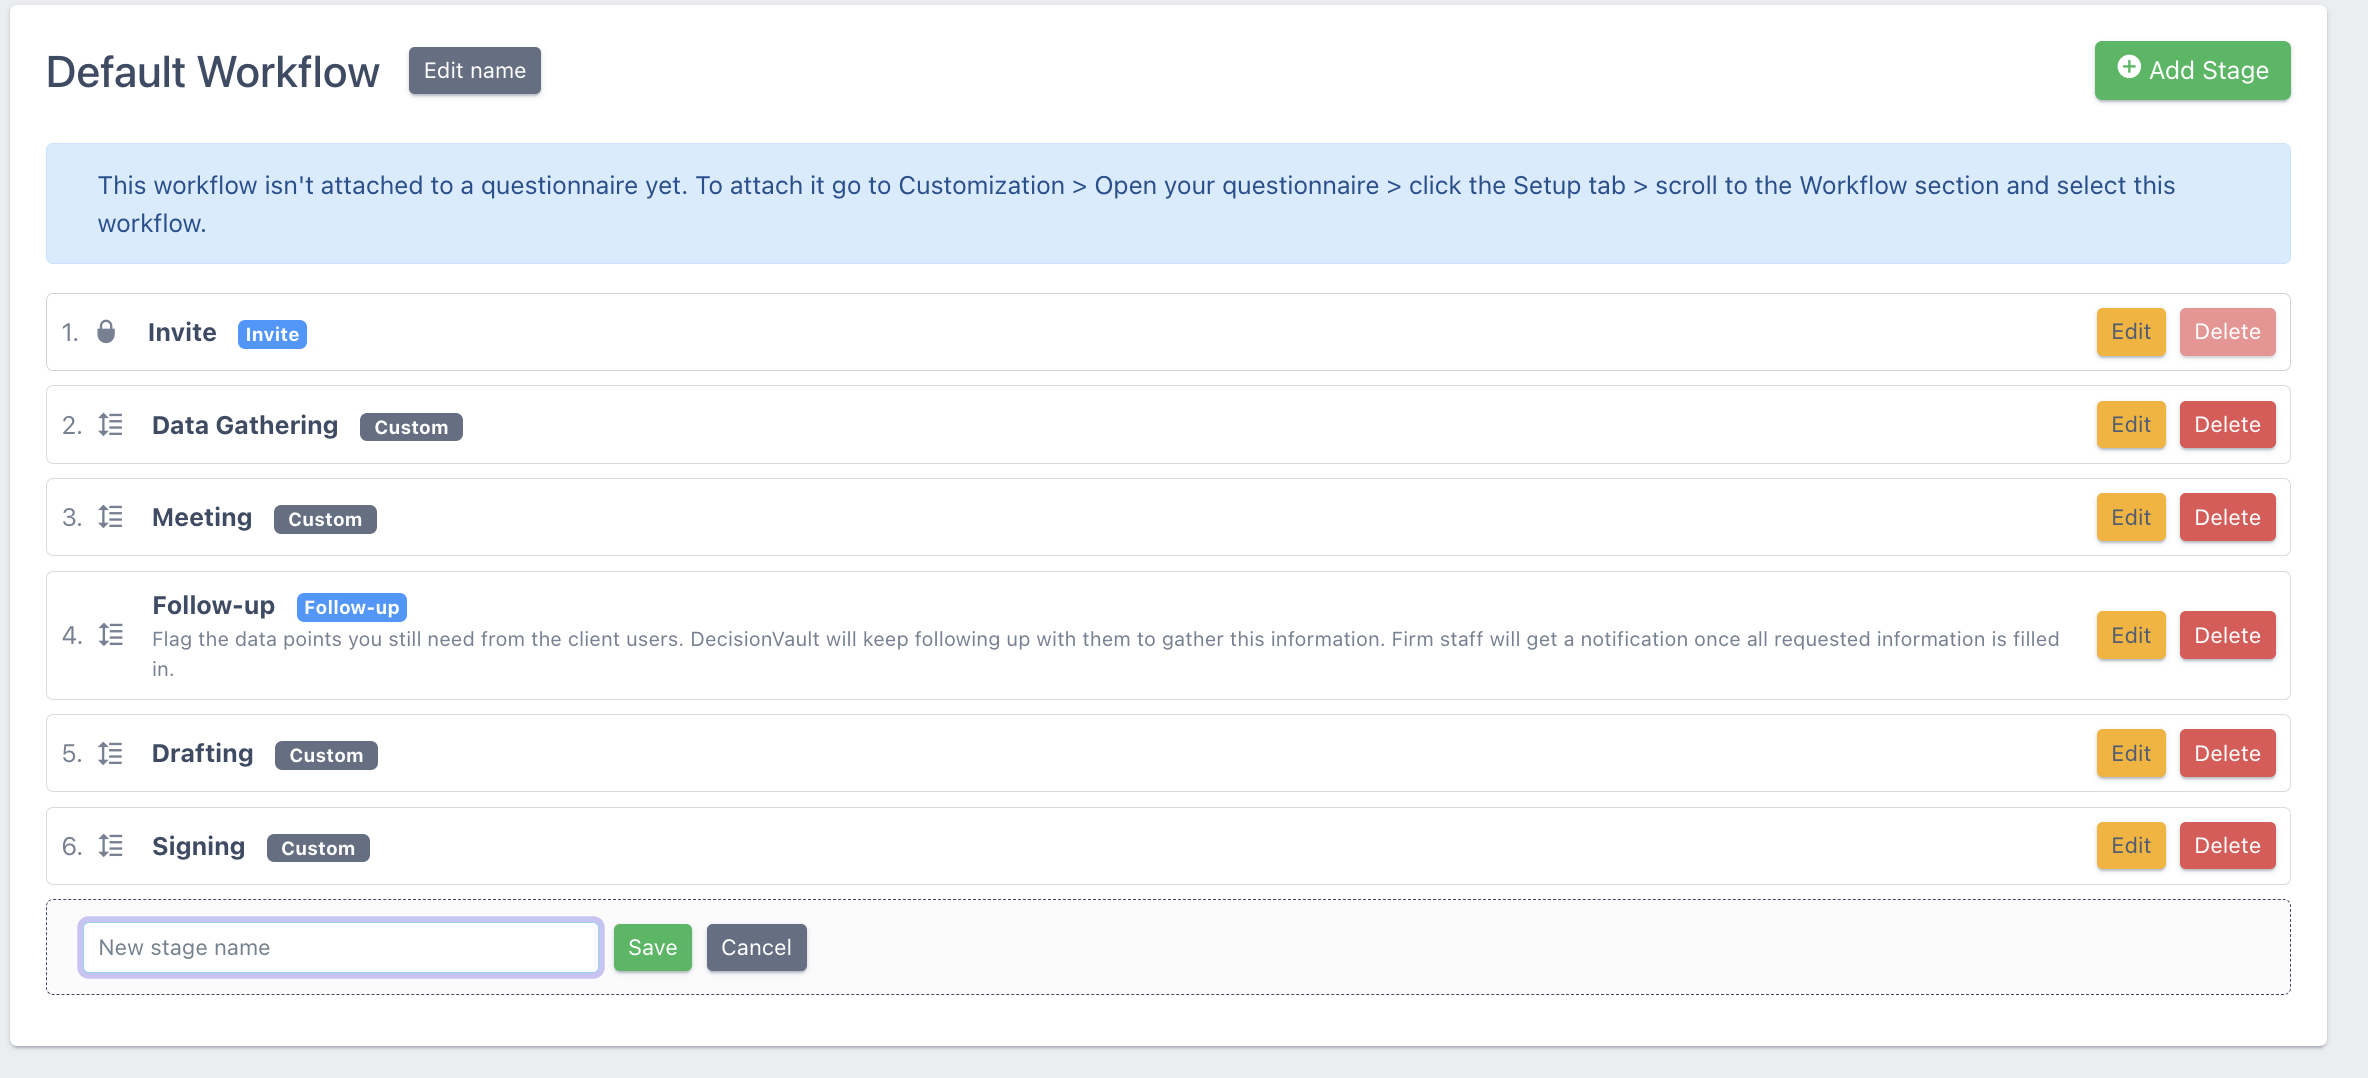
- Reorder: drag and drop a stage by the handle next to its number.
- Rename a stage: select Edit, type the new name, then Save (or Cancel).
- Delete a stage: select Delete. You cannot delete a stage that has active matters. Move those matters to another stage first.
- Invite: stage is locked in first position but can be renamed.
- Follow-up: shows a Follow-up tag and a short description. It cannot be placed last.
Attach a workflow to a questionnaire
Any questionnaire can use any workflow, and several questionnaires can share one.
- Go to Customization and open the questionnaire
- Open the Setup tab
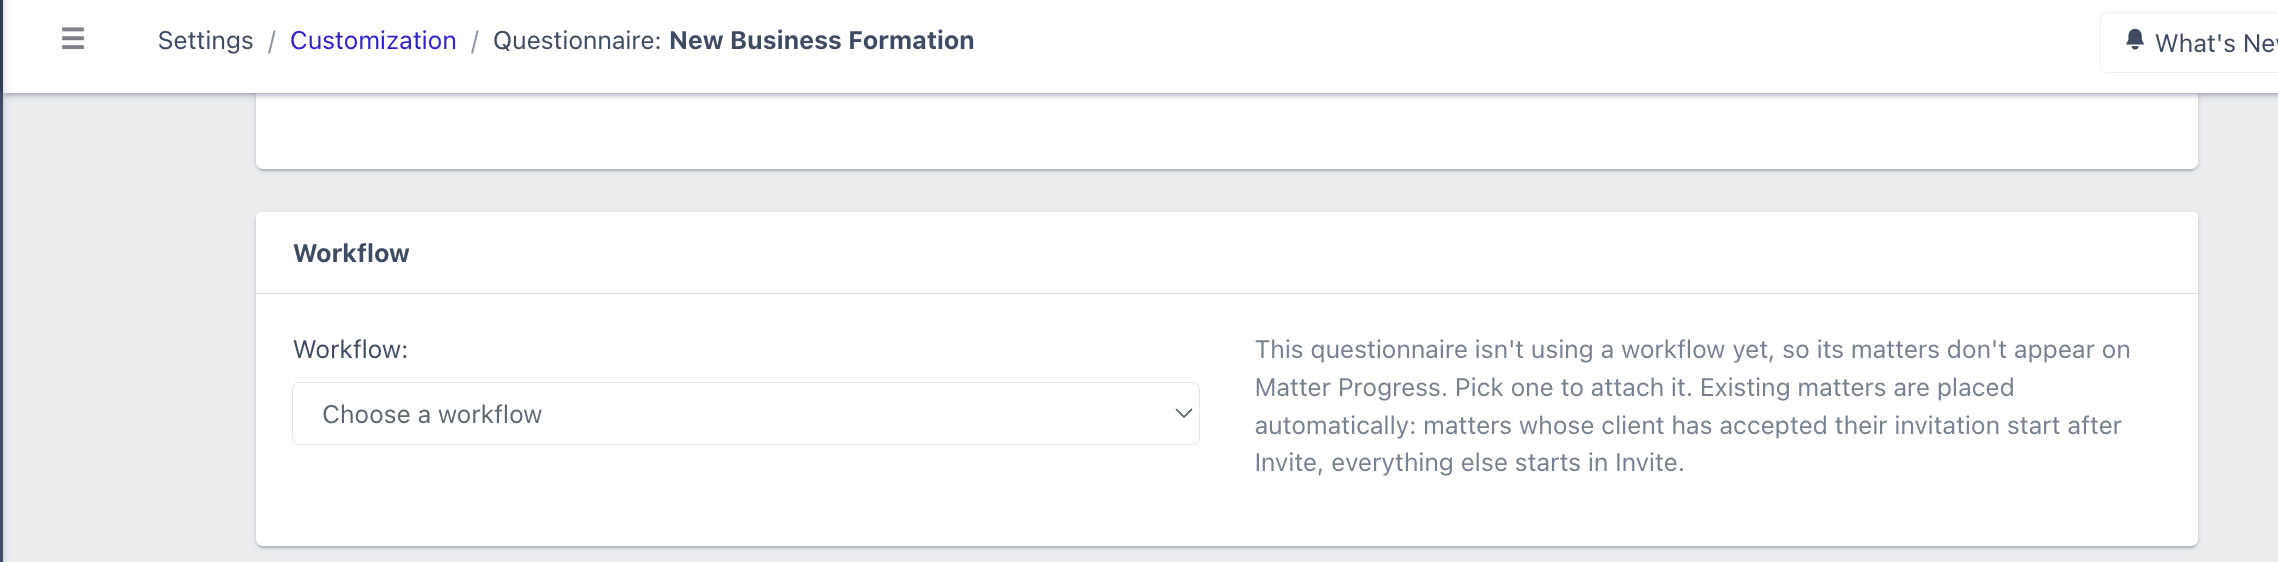
- Scroll to the Workflow card
-
Choose a workflow from the Workflow dropdown ("Choose a workflow")
Confirm where existing matters are placed
When you choose a workflow for a questionnaire, an Attach workflow screen opens before anything changes. It tells you how many open matters the questionnaire has. Attaching places each one in the workflow based on whether its client has accepted the invitation. Closed matters are left as they are.
The table shows where those matters will land:
- Invitation not yet accepted: these matters are placed in Invite.
- Client accepted invitation: these matters are placed in Data Gathering, the stage right after Invite.
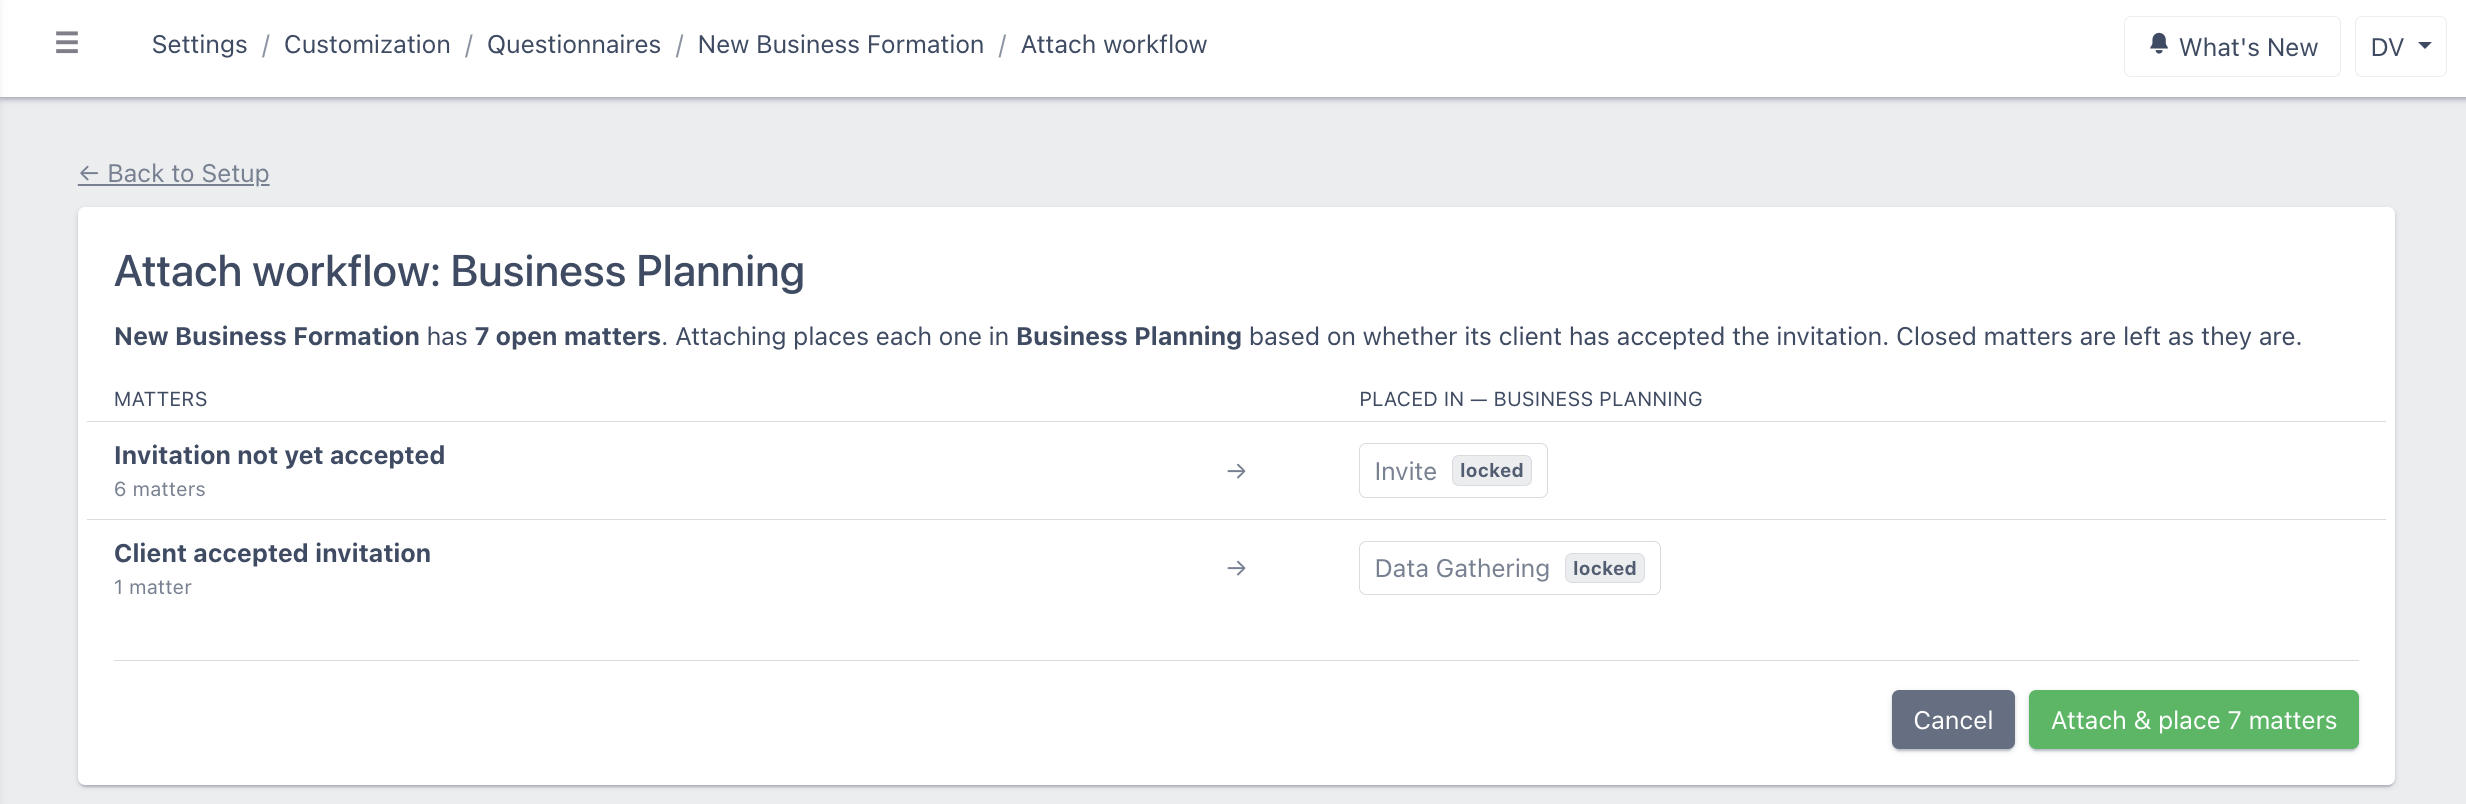
What happens to existing matters: they are placed automatically. Matters whose client has accepted their invitation start after Invite. Everything else starts in Invite. A questionnaire without a workflow does not appear on Matter Progress. Its matters show up on the workflow's tab as soon as you attach one.
A workflow that is not attached to any questionnaire shows a blue note at the top: "This workflow isn't attached to a questionnaire yet.
Switch a questionnaire to a different workflow
If a questionnaire already uses a workflow and you choose another, a Switch workflow screen opens. It is titled with the change and tells you how many matters will move.
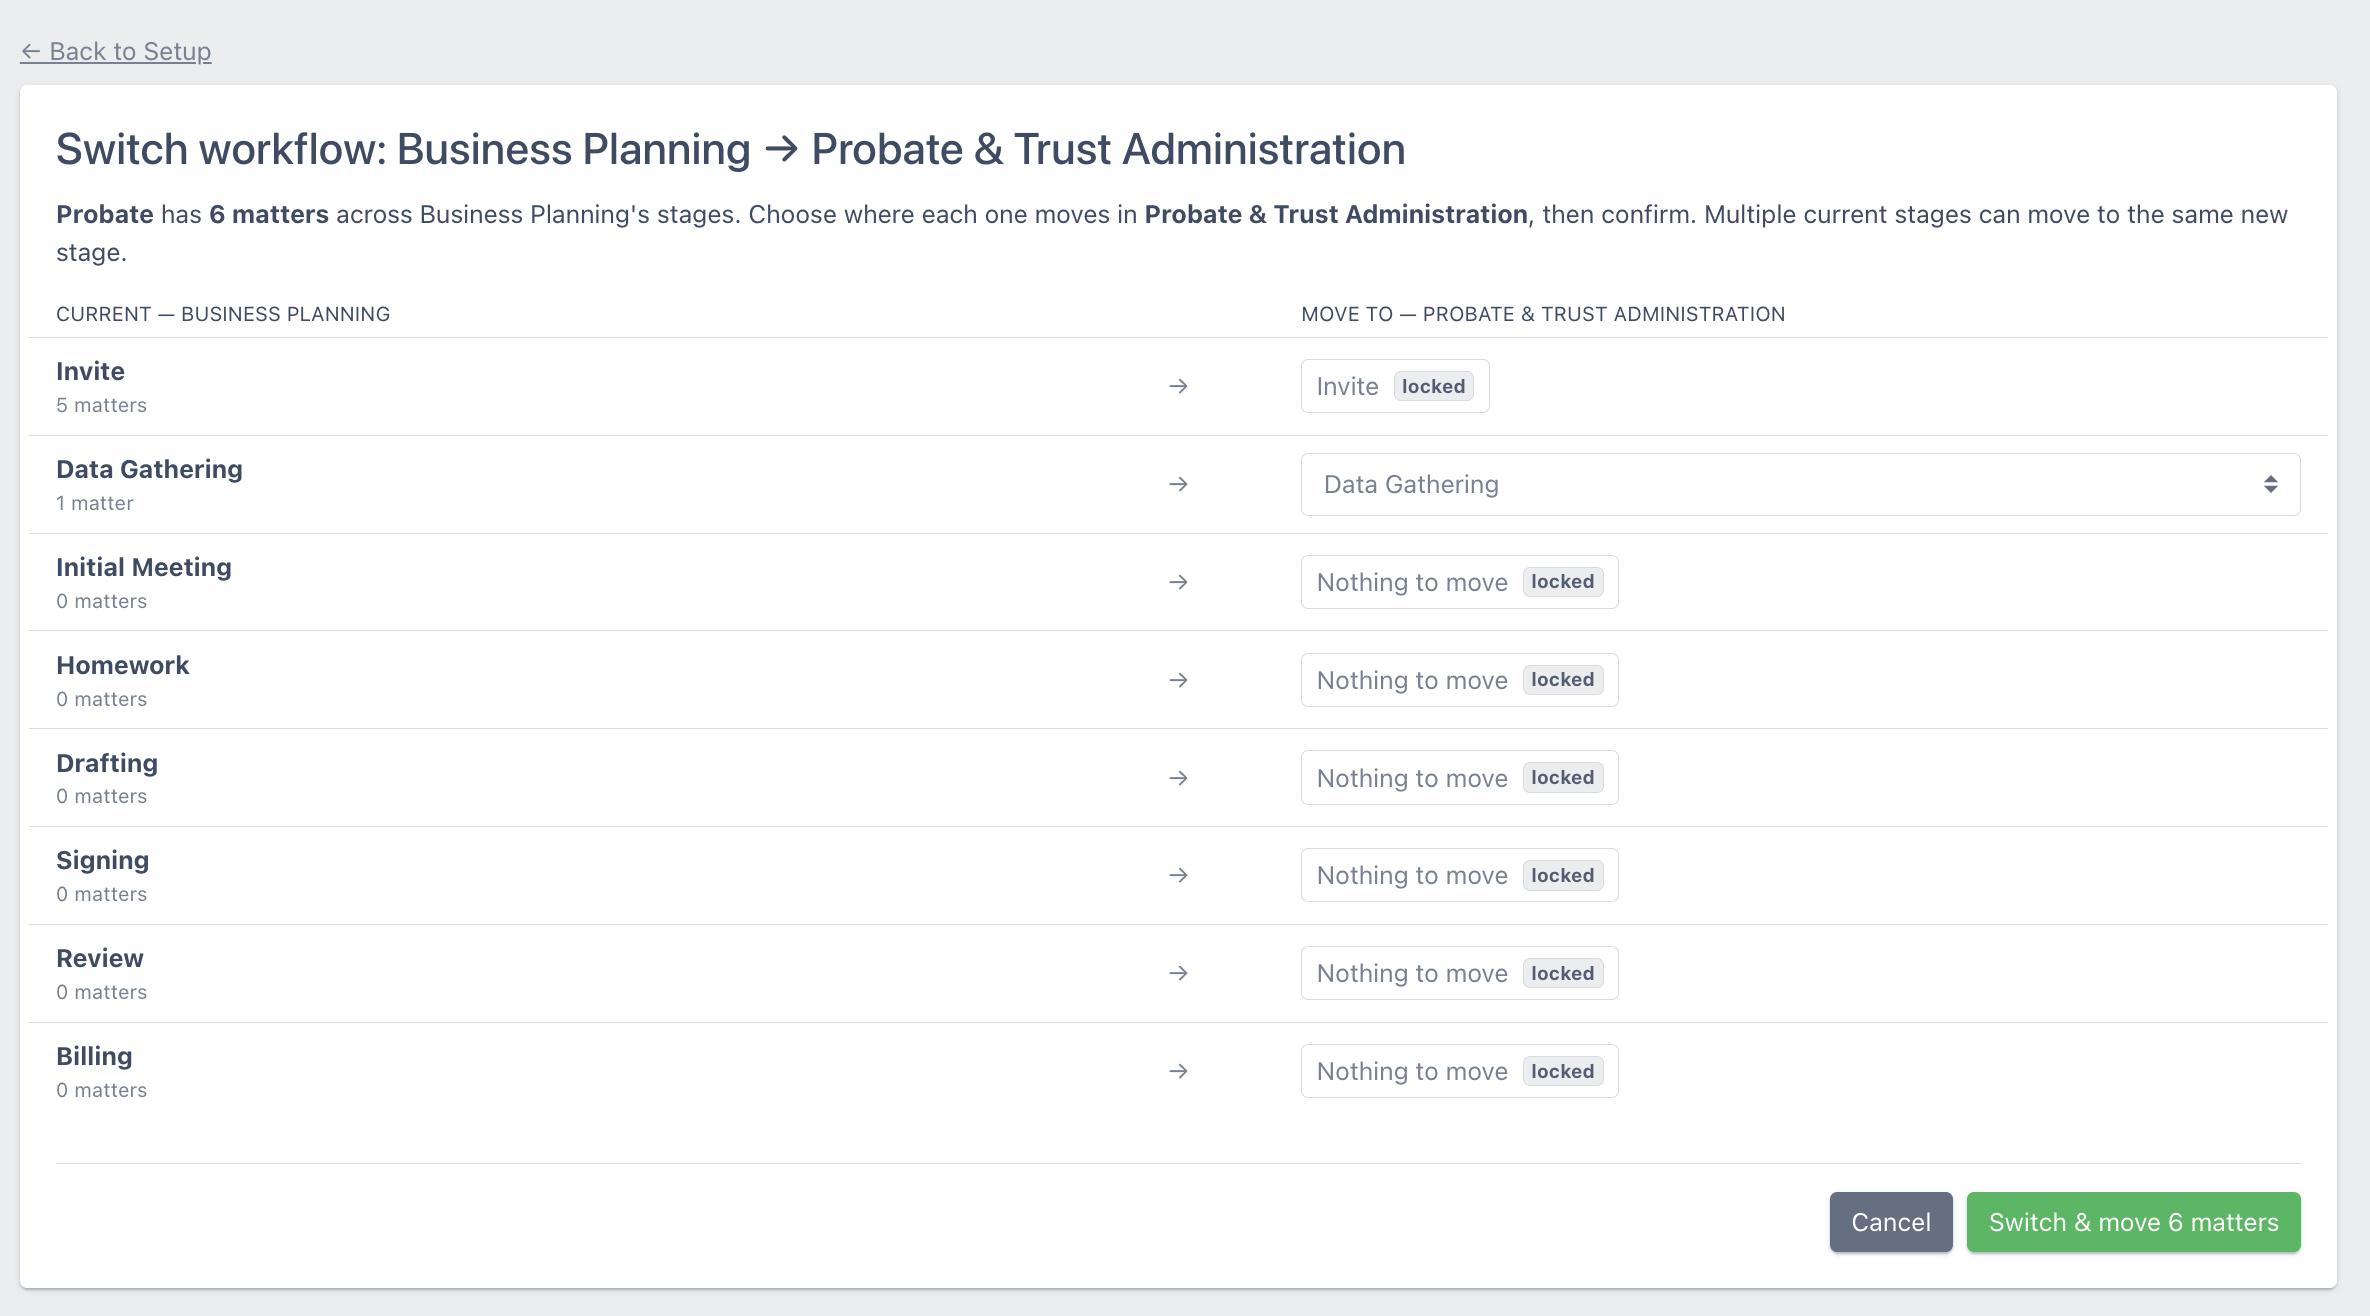
- The left column, Current, lists each stage of the old workflow with its number of matters
- The right column, Move to, shows where those matters go in the new workflow. Pick a stage from the dropdown for each stage that has matters. Several current stages can move to the same new stage.
- Stages with no matters show Nothing to move and are locked
- Invite maps to Invite and is locked
- Select Switch & move N matters to confirm, or Cancel. Back to Setup returns you without changing anything.
The matters then appear on the new workflow's tab on Matter Progress.